Ford Ka Inner Sill and Rear Arch Repair: A Real Rust Job, Start to Finish
“Rust like this doesn’t fix itself.” That was the caption when the video of this job went up, and it is the most honest line in vehicle welding. A Ford Ka came into our Mansfield Woodhouse workshop with a rotten inner sill and a rear wheel arch that had rusted through, and the only real fix was to cut the bad metal out and put new steel in.
This is a walk-through of that Ford Ka sill repair, step by step, as Jimmy carried it out: what we cut away, what we made, how it went back together, and why each stage is done the way it is. If your own Ka, or any small hatchback, is showing rust low down behind the doors, this is what putting it right properly looks like.
Reviewed and signed off by Star Welding Mansfield· Published 6 October 2026 · Last updated 6 October 2026
Can a Ford Ka inner sill and rear arch be repaired?
Yes, in most cases. The rotten steel is cut back until only bare, sound metal remains, new panels are shaped to fit the gap, and they are tacked in place and then welded fully into the surrounding structure. Done that way, the repaired area should be as strong as the original, which is what the MOT expects of a structural repair.
Watch the Ford Ka job
The job was filmed in the workshop and posted on the TikTok account of Star Garage Mansfield, our sister business next door. The short clip shows the whole repair from the rotten arch to the finished panel.
If the video does not appear, your cookie settings may be holding it back. You can also watch the full Ford Ka job on TikTok.
What we found when the Ka was on the ramp
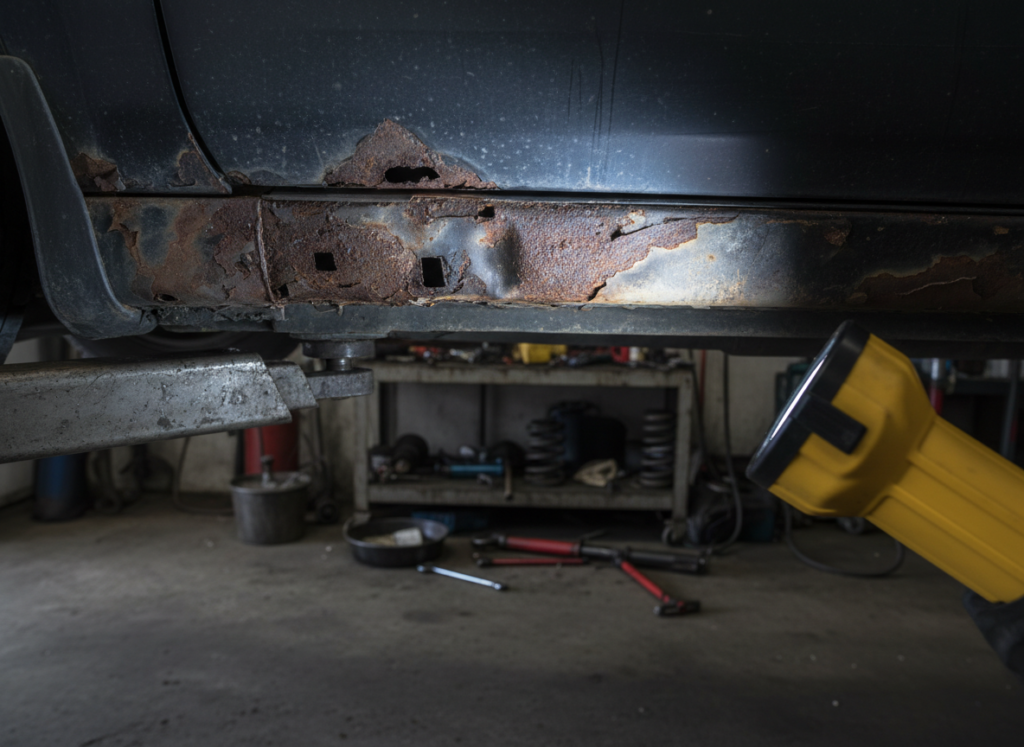
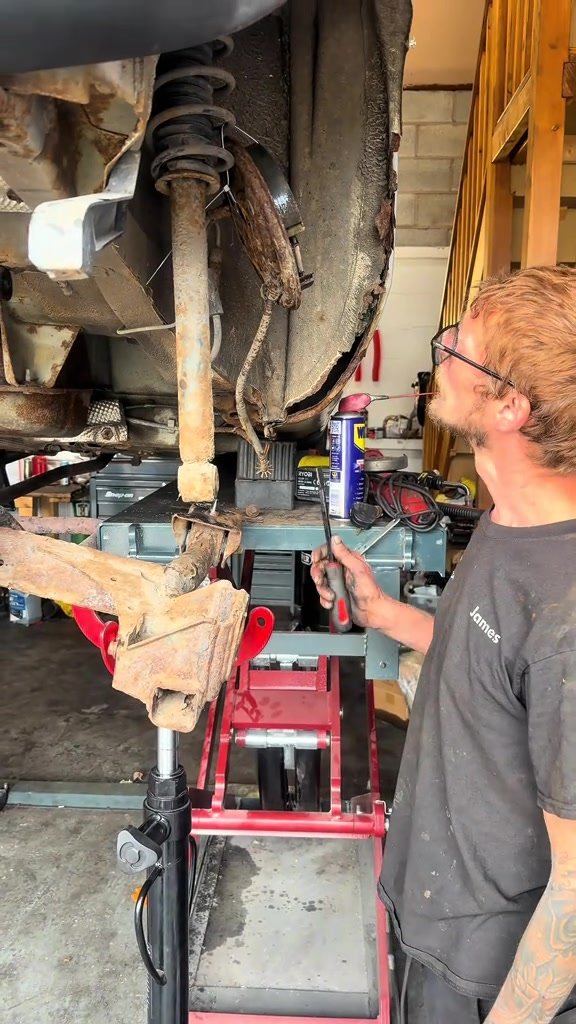
With the car raised and the rear wheel off, the problem was obvious. The rear wheel arch lip had rotted away, and the corrosion carried on down into the inner sill, the box-section that runs along the bottom of the body under the doors. Rust in this area rarely stays on the surface. Once water and road salt get between panels, the steel is eaten from the inside, and what looks like a bubble in the paint can be a hole by the time it is cleaned back.
That is why the first job on any rust repair is to find where the bad metal actually stops. Until it is cut back, nobody can honestly say how big the repair is.
Why the sill and arch matter more than they look
It is tempting to treat a rusty arch as a cosmetic problem. On a modern car built as one stressed shell, the sills and the panels around them are part of what holds the body together, and the MOT treats them that way.
The DVSA’s guidance on structural integrity and corrosion points out that corrosion of a part such as a door sill may be very important on one type of vehicle construction and less important on another. It also defines “prescribed areas”: load-bearing structure within 30cm of the mounting point for a testable item such as the suspension, steering, brakes or a seat belt. The manual uses an inner sill as its own example, telling testers that when they check a seat belt mounting on an inner sill they must also consider the sill, door pillar and floor around it.
Inside a prescribed area, a tester should reject corrosion if it has made a hole, if the metal does not feel firm under finger and thumb pressure, or if pressing it creates a hole. So the low, rear part of a small car’s body, close to the rear suspension and the seat belt mountings, is exactly where a little rust can turn into an MOT failure.
The repair, step by step
This is the sequence Jimmy followed on the Ka. It is the same basic order we work to on most sill and arch repairs, because each stage depends on the one before it.
- Cut back to bare, good metal. All of the rot comes out. The cut keeps going until the edges are clean, solid steel with no pitting or thinning left behind.
- Fabricate new panels to fit. New sections were made from sheet steel and shaped to the opening that was left, so they matched the profile of the inner sill and the curve of the arch.
- Tack the new panel in. Small tack welds hold the panel in position first, so its fit and alignment can be checked before anything is fully welded.
- Build the arch back up. With the sill section in place, the arch was rebuilt so the wheel opening had its proper shape again.
- Weld the sections together. The new metal was then welded into the surrounding structure, joining the sections along the rear quarter panel.
- Reassemble. Only once the welding was finished did the hub assembly and the other parts go back on.

Why we cut back so far
The most common shortcut on rusty sills is to leave the corrosion in and cover it. A plate goes over the hole, or filler goes over the plate, and the car looks fine for a while. The rust underneath carries on, and the repair has nothing solid to hold on to.
The MOT manual is clear on this. Repairs to structural components must appear to be as strong as the original structure, and any plating or welding has to extend to a sound part of the load-bearing member. That is the whole reason for cutting back to good metal: new steel welded to old rust is only as strong as the rust.
The same guidance lists repair methods testers cannot accept on load-bearing members, including gas brazing, soldering, adhesive bonding, fibre reinforcement and body filler. Patch repairs, unless they replace a spot-welded panel that has been removed, must be continuously seam welded. Our guide to how an inner sill rust repair is carried out covers that difference in more detail.
Why the panels were made rather than bought
On this job, the new metal was fabricated in the workshop to fit the gap left after cutting out the rot. Making the panel to the opening means it follows the shape of what was actually removed, rather than the shape of a panel designed for a different amount of damage.
That matters most where rust has spread across more than one panel, as it had here, with the inner sill and the arch both affected. A fabricated section can be made to bridge exactly the area that needs replacing, and no more good metal has to be cut away to suit it.
Tacking before full welding is part of the same thinking. With the panel held by a few small welds, its position can be checked against the arch line and the rest of the body. Once it is fully welded, there is no adjusting it.
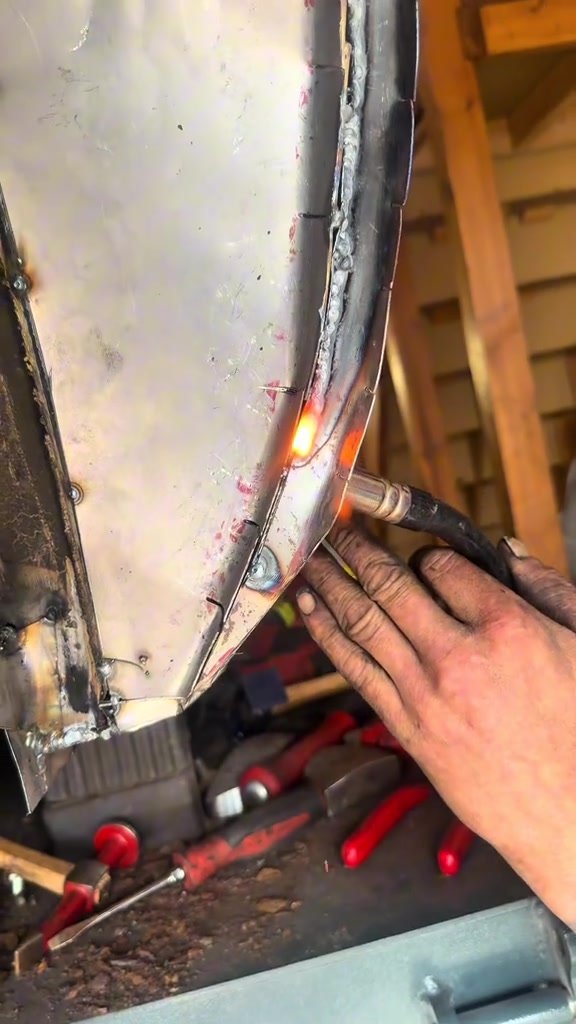
The finished arch
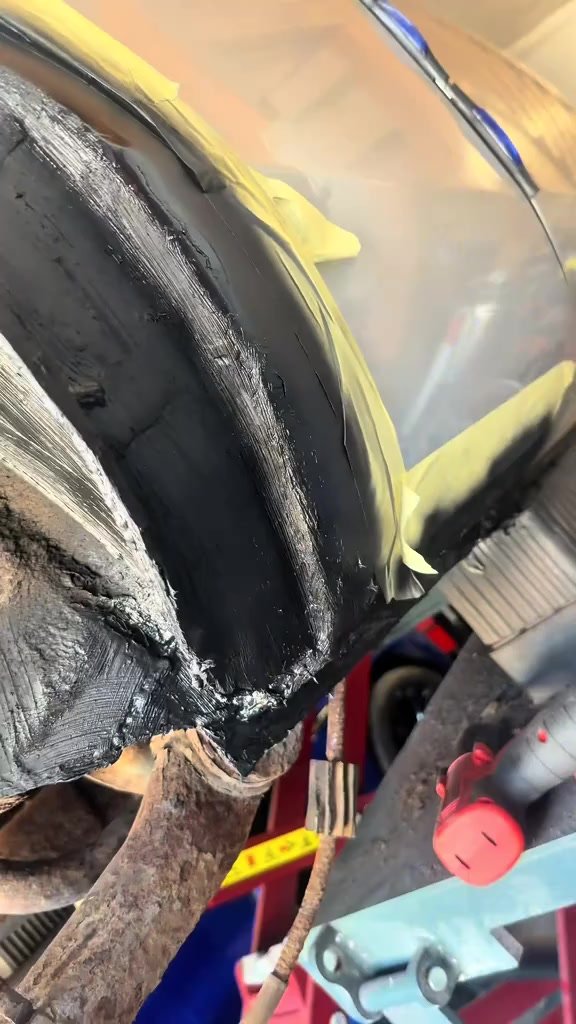
With the new metal welded in, the arch had its shape back and the inner sill was solid steel again. The repaired area was then sealed before the running gear went back on, because bare weld and freshly cut steel are exactly where new rust starts.
Protection after welding is what decides how long a repair lasts. We cover the options, including cavity wax and underbody protection, in our article on protecting a car from rust after a welding repair.
Own a Ka? What to look for
You do not need to lift the car to get an early warning. A few minutes with a torch can tell you a lot:
- The rear arch lip. Run a finger around the inside edge of the arch. Bubbling paint, flaking or a rough, crusty edge is rust working its way out.
- The sill below the doors. Open the doors and look along the bottom of the body, especially where the sill meets the rear arch.
- Under the car, behind the rear wheels. Look for scaling, holes or fresh underseal on an otherwise old underside.
- Your MOT history. Corrosion often shows up as an advisory before it becomes a failure. If a past test mentions corrosion near the sills or rear suspension, that area is worth having looked at.
If you find a soft spot, do not poke it with a screwdriver to see how far it goes, and do not paint over it. Get it inspected while the repair is still small. Our article on wheel arch rust repair explains why arches are often the first place rust shows.
This kind of work is part of our sill, arch and floor pan repair service, carried out in the workshop by coded welders.
Frequently asked questions
Can an inner sill be welded?
Yes. The corroded part of the inner sill is cut out back to sound steel and a new section is shaped, tacked in and welded to the surrounding structure. For an MOT, the repair has to extend to sound metal and appear as strong as the original.
Is a rusty sill an MOT failure?
It can be. Where the sill is within 30cm of a mounting for something like a seat belt or the suspension, testers reject corrosion that has made a hole, feels soft under finger and thumb pressure, or gives way when pressed. Light surface rust on solid steel is not a failure on its own.
Can a rotten rear wheel arch be repaired without replacing the whole panel?
Usually. As on this Ka, the rotten section can be cut out and replaced with new metal shaped to the arch, then welded in. How much is replaced depends on how far the rust has spread once it is cleaned back.
Can I use filler on a rusty sill to pass the MOT?
No. The MOT inspection manual lists body filler, adhesive bonding, fibre reinforcement, soldering and gas brazing as unacceptable for repairing load-bearing structure. Filler over rust also lets the corrosion carry on underneath.
Rust on your sills or arches? Bring it in
Star Welding Mansfield is a workshop-based vehicle welding specialist on New Mill Lane, Mansfield Woodhouse. Our coded MIG and TIG welders repair sills, arches, floor pans and chassis on cars, vans and light commercials.
If your Ka or any other car has rust low down on the body, or an MOT advisory or failure for corrosion, bring it to the workshop. We will clean back the area, show you what is there and tell you honestly what the repair involves.